【Swift】watchOS 3 × Core Motion
【Swift】watchOS 3 × Core Motion
今回はApple Watch Series 2を購入しましたので早速遊んでみました。
WatchAppのつくりかた
watchAppは基本的にiOS向けアプリの拡張機能なので、Extensionで実装します。
Target->「+」->watchOS->Watch Kit Appと進んでいけばExtensionを追加できます。
ターゲットの追加が完了すると、ソースツリー内に「ターゲット名」、「ターゲット名 Extension」のフォルダが2つ作成されます。
今回触るのは「ターゲット名 Extension」内のInterfaceController.swiftです。
InterfaceControllerの編集
import CoreMotion

class InterfaceController: WKInterfaceController {
    let motionMng = CMMotionManager()
    let queue = OperationQueue()

    override func awake(withContext context: Any?) {
        super.awake(withContext: context)

        // モーションが取得できない
        if ! motionMng.isDeviceMotionAvailable {
            return
        }

        // 値の取得を開始
        motionMng.startDeviceMotionUpdates(to: queue) {
            deviceMotion, error in
            // エラー
            if error != nil {
                print("error: \(error!)")
            }
            // 値の取得に成功
            if deviceMotion != nil {
                print("姿勢角 = \(deviceMotion!.attitude)")
                print("重力加速度 = \(deviceMotion!.gravity)")
                print("回転率 = \(deviceMotion!.rotationRate)")
                print("デバイスの加速度 = \(deviceMotion!.userAcceleration)")
                print("-------------------------------------------")
            }
        }
    }


}
まとめ
今回は値の取得のみでしたが、この値を計算し、水平器やなど作れたら良いかなー 走ってるときと車移動などの判別はデバイスの加速度などを見て判断できるのではないでしょうか
【C#】ユーザコントロールでテロップ表示
今回もWindowsフォーム アプリケーション関連のメモです。
Windowsフォームアプリの要件の場合で、たまに出てくる文字列のテロップ表示を行うユーザコントロールを今回は作成したいと思います。
namespace TelopSample
{
  partial class TelopLabel
  {
    /// <summary>
    /// 必要なデザイナー変数です。
    /// </summary>
    private System.ComponentModel.IContainer components = null;

    /// <summary>
    /// 使用中のリソースをすべてクリーンアップします。
    /// </summary>
    /// <param name="disposing">マネージ リソースが破棄される場合 true、破棄されない場合は false です。</param>
    protected override void Dispose(bool disposing)
    {
      if (disposing && (components != null))
      {
        components.Dispose();
      }
      base.Dispose(disposing);
    }

    #region コンポーネント デザイナーで生成されたコード

    /// <summary>
    /// デザイナー サポートに必要なメソッドです。このメソッドの内容を
    /// コード エディターで変更しないでください。
    /// </summary>
    private void InitializeComponent()
    {
      this.pnlTelop = new System.Windows.Forms.Panel();
      this.SuspendLayout();
      //
      // pnlTelop
      //
      this.pnlTelop.Dock = System.Windows.Forms.DockStyle.Fill;
      this.pnlTelop.Location = new System.Drawing.Point(0, 0);
      this.pnlTelop.Margin = new System.Windows.Forms.Padding(0);
      this.pnlTelop.Name = "pnlTelop";
      this.pnlTelop.Size = new System.Drawing.Size(300, 50);
      this.pnlTelop.TabIndex = 0;
      //
      // TelopLabel
      //
      this.AutoScaleDimensions = new System.Drawing.SizeF(29F, 72F);
      this.AutoScaleMode = System.Windows.Forms.AutoScaleMode.Font;
      this.Controls.Add(this.pnlTelop);
      this.Margin = new System.Windows.Forms.Padding(0);
      this.Name = "TelopLabel";
      this.Size = new System.Drawing.Size(300, 50);
      this.Load += new System.EventHandler(this.TelopLabel_Load);
      this.ResumeLayout(false);

    }

    #endregion

    private System.Windows.Forms.Panel pnlTelop;

  }
}
ポイントは文字を動かすのではなく、ラベル自体をタイマーで移動させることです。
コントロールの幅と文字列を実際に描画した幅を算出、連結表示したい場合なども考慮し複数のラベルを生成します。生成したラベルの位置をタイマーでずらしながら表示しているだけです。
もっと軽くしたいのでしたら文字を自力レンダリングするのが良いでしょう。
using System;
using System.Collections.Generic;
using System.ComponentModel;
using System.Drawing;
using System.Windows.Forms;

namespace TelopSample
{
  /// <summary>
  /// テロップユーザコントロール
  /// </summary>
  public partial class TelopLabel : UserControl
  {
    #region メンバ変数
    /// <summary>
    /// テロップの実行を制御するタイマー
    /// </summary>
    private Timer _Timer;

    /// <summary>
    /// テロップ表示するテキスト
    /// </summary>
    private string _TelopText = String.Empty;

    /// <summary>
    /// テロップ表示するテキストの配置
    /// </summary>
    private ContentAlignment _TelopTextAlign = ContentAlignment.MiddleCenter;

    /// <summary>
    /// スクロールの実行可否
    /// </summary>
    private bool _DoScroll = false;

    /// <summary>
    /// 連結表示
    /// </summary>
    private bool _ConnectedDisplay = false;

    /// <summary>
    /// タイマーの間隔
    /// </summary>
    private int _Interval = 1;

    /// <summary>
    /// コントロールの表示間隔
    /// </summary>
    private int _NextControlIntervalWidth = 0;

    /// <summary>
    /// テロップ表示するラベルオブジェクトのコレクション
    /// </summary>
    private List<Label> _LabelCaptions;
    #endregion

    #region プロパティ
    /// <summary>
    /// テロップに表示する文字列を取得または設定します。
    /// </summary>
    [Browsable(true)]
    [Category("表示")]
    [Description("テロップに表示する文字列を取得または設定します。")]
    public string TelopText
    {
      get
      {
        return this._TelopText;
      }
      set
      {
        if (this._TelopText != value)
        {
          this._TelopText = value;
        }
      }
    }

    /// <summary>
    /// テロップに表示するテキストの配置を取得または設定します。
    /// </summary>
    [Browsable(true)]
    [Category("表示")]
    [Description("テロップに表示するテキストの配置を取得または設定します。")]
    public ContentAlignment TelopTextAlign
    {
      get
      {
        return this._TelopTextAlign;
      }
      set
      {
        if (this._TelopTextAlign != value)
        {
          this._TelopTextAlign = value;
        }
      }
    }

    /// <summary>
    /// テロップの実行可否を取得または設定します。
    /// </summary>
    [Browsable(true)]
    [Category("動作")]
    [Description("スクロールの実行可否を取得または設定します。")]
    public bool DoScroll
    {
      get
      {
        return this._DoScroll;
      }
      set
      {
        if (this._DoScroll != value)
        {
          this._DoScroll = value;
        }
      }
    }

    /// <summary>
    /// テロップする文字を連結表示するかを示す値を取得または設定します。
    /// </summary>
    [Browsable(true)]
    [Category("動作")]
    [Description("テロップする文字を連結表示するかを示す値を取得または設定します。")]
    public bool ConnectedDisplay
    {
      get
      {
        return this._ConnectedDisplay;
      }
      set
      {
        if (this._ConnectedDisplay != value)
        {
          this._ConnectedDisplay = value;
        }
      }
    }

    /// <summary>
    /// タイマーの間隔を取得または設定します。
    /// </summary>
    /// <remarks>ミリ秒で設定します。1ミリ秒がデフォルト値です。
    /// 早い:1ミリ秒、普通:25ミリ秒、遅い:50ミリ秒でToolからは設定を行う。
    /// </remarks>
    [Browsable(true)]
    [Category("動作")]
    [Description("タイマーの間隔を取得または設定します。")]
    public int Interval
    {
      get
      {
        return this._Interval;
      }
      set
      {
        if (this._Interval != value)
        {
          this._Interval = value;
        }
      }
    }
    #endregion

    #region コンストラクタ
    /// <summary>
    /// クラスの新しいインスタンスを初期化します。
    /// </summary>
    public TelopLabel()
    {
      InitializeComponent();
      this.DoubleBuffered = true;
    }
    #endregion

    #region イベント
    /// <summary>
    /// コントロールが初めて表示される前に発生します。
    /// </summary>
    /// <param name="sender">イベントの送り手</param>
    /// <param name="e">イベントの引数</param>
    private void TelopLabel_Load(object sender, EventArgs e)
    {
      InitializeControl();
    }

    /// <summary>
    /// 指定したタイマーの間隔が経過し、タイマーが有効である場合に発生します。
    /// </summary>
    /// <param name="sender">イベントの送り手</param>
    /// <param name="e">イベントの引数</param>
    private void TelopTimer_Tick(object sender, EventArgs e)
    {
      Animation();
    }
    #endregion

    #region override
    /// <summary>
    /// Resize イベントを発生させます。
    /// </summary>
    /// <param name="e">イベントの引数</param>
    protected override void OnResize(EventArgs e)
    {
      if (this._Timer != null) { this._Timer.Enabled = false; }

      InitializeControl();

      base.OnResize(e);
    }
    #endregion

    #region Privateメソッド
    /// <summary>
    /// コントロールを構築します。
    /// </summary>
    private void InitializeControl()
    {
      this.pnlTelop.BackColor = this.BackColor;

      // テロップ表示するラベルコントロールのコレクションを作成
      CreateLabelList();

      // スクロール開始
      if (this._DoScroll)
      {
        this._Timer = new Timer();
        this._Timer.Interval = this._Interval;
        this._Timer.Tick += new EventHandler(TelopTimer_Tick);
        this._Timer.Enabled = true;
      }
    }

    /// <summary>
    /// テキストとフォントサイズから適切なコントロールサイズを算出します。
    /// </summary>
    private Size CalcTelopLabelSize()
    {
      // 仮のキャンバスへ文字列を描画して、コントロールのサイズを算出する
      using (var canvas = new Bitmap(this.Width, this.Height))
      using (var g = Graphics.FromImage(canvas))
      {
        TextRenderer.DrawText(g, this._TelopText, this.Font, new Point(0, 0), Color.Black);
        // 文字列を描画するときの大きさを計測する
        var size = TextRenderer.MeasureText(g, this._TelopText, this.Font);

        return size;
      }
    }

    /// <summary>
    /// テロップ表示を行うためのラベルのコレクションを生成します。
    /// </summary>
    private void CreateLabelList()
    {
      this._LabelCaptions = new List<Label>();

      // ラベルコントロールのサイズ算出
      var size = CalcTelopLabelSize();

      if (size.Height <= 0 || size.Width <= 0) { return; }

      // ラベルとキャンバスのサイズからコントロールのコレクション数を算出する
      // 文字列のサイズより表示領域の幅が大きいときはラベルを複数生成して連結表示するようにコレクション数を求める
      // それ以外の場合、2固定で連結表示する
      var num = 2;
      if (this._ConnectedDisplay)
      {
        num = (int)(size.Width < this.Width ?
          System.Math.Ceiling((double)(this.Width + size.Width) / (double)size.Width) :
          System.Math.Ceiling((double)size.Width / (double)this.Width));
      }

      for (int i = 0; i < num; i++)
      {
        var control = new Label();
        control.AutoSize = false;
        control.Text = this._TelopText;
        control.TextAlign = this._TelopTextAlign;
        control.Font = this.Font;
        control.ForeColor = this.ForeColor;
        control.BackColor = Color.Transparent;
        control.Size = size;
        control.Height = this.pnlTelop.Height;
        control.Top = 0;
        control.Left = this.Width + (size.Width * i);
        control.Anchor = (AnchorStyles.Top | AnchorStyles.Bottom);
        control.BringToFront();
        this._LabelCaptions.Add(control);

        // 連結しない場合、一件のみ生成する
        if (!this._ConnectedDisplay) { break; }
      }
      this.pnlTelop.Controls.Clear();
      this.pnlTelop.Controls.AddRange(this._LabelCaptions.ToArray());

      // コントロールの表示間隔を求める
      if (this._ConnectedDisplay && this.Width < size.Width * this._LabelCaptions.Count)
      {
        this._NextControlIntervalWidth = size.Width * (this._LabelCaptions.Count - 1);
      }
      else
      {
        this._NextControlIntervalWidth = this.Width;
      }
    }

    /// <summary>
    /// テロップのアニメーションを行います。
    /// </summary>
    private void Animation()
    {
      var max = this._LabelCaptions.Count;

      for (int i = 0; i < max; i++)
      {
        this._LabelCaptions[i].Top = 0;
        this._LabelCaptions[i].Left = this._LabelCaptions[i].Left - 1 != -this._LabelCaptions[i].Width ?
          this._LabelCaptions[i].Left - 1 : this._NextControlIntervalWidth;
      }
    }
    #endregion
  }
}
今回は横移動のテロップを紹介しましたが、縦移動がしたい場合は1文字ごとにラベルを生成してポイントをずらすことで可能です。
遂に出た - Mac版Visual Studio
MicrosoftのイベントConnect(); // 2016で「Visual Studio for Mac」が発表されたので、早速入れてみました!
「Visual Studio for Mac」は「Xamarin Studio」をベースにしたもので、macOS、iOS、Android、サーバーアプリケーションの開発が可能みたいです。
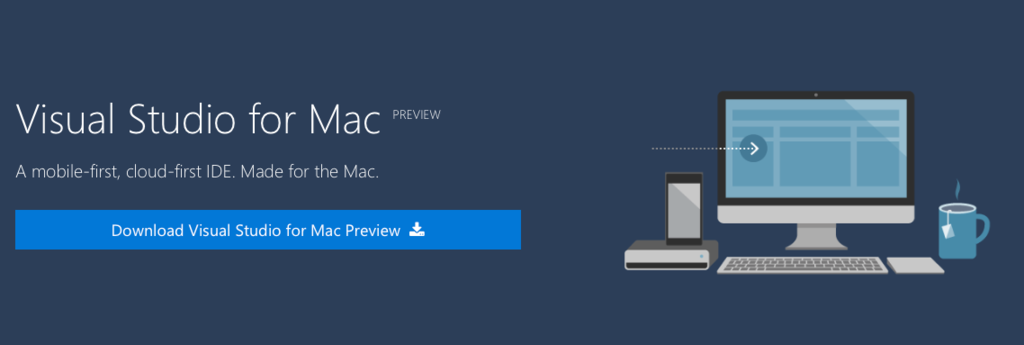
ダウンロードはMicrosoftの公式サイトからできます。
Visual Studio for Mac
(iOSアプリを作成する場合は別途Xcodeが必要)
とりあえずダウンロードしてインストール。
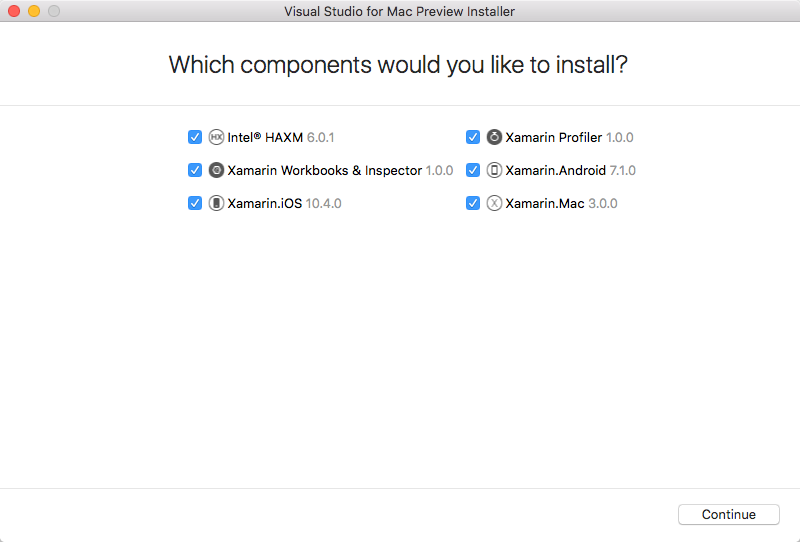
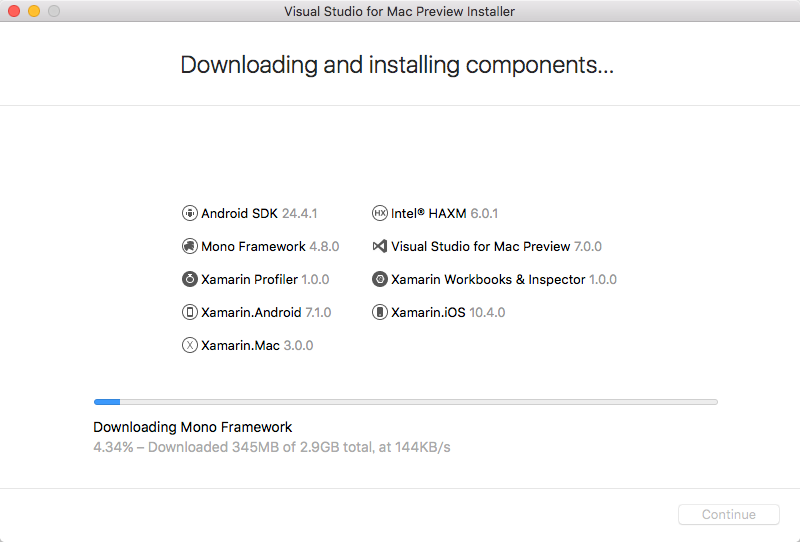
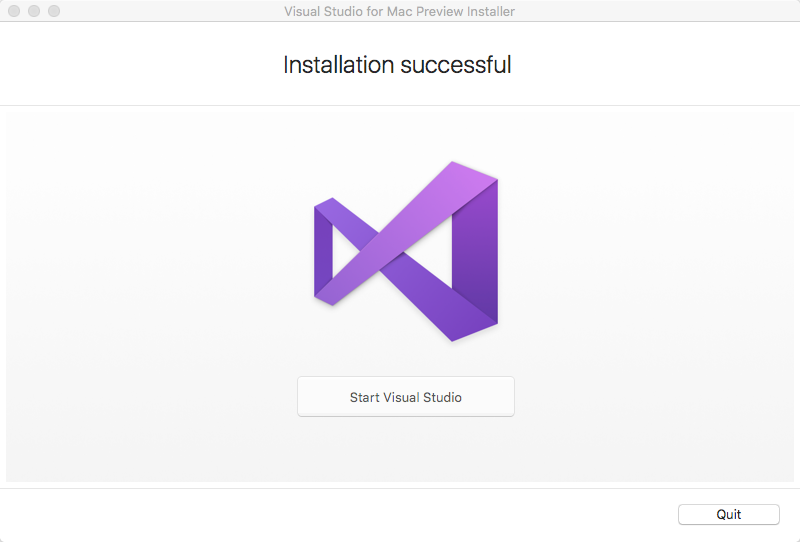
特に何もすることなく、ボタンをポチポチしているだけでインストールが終わりました。
楽でいいですねー。
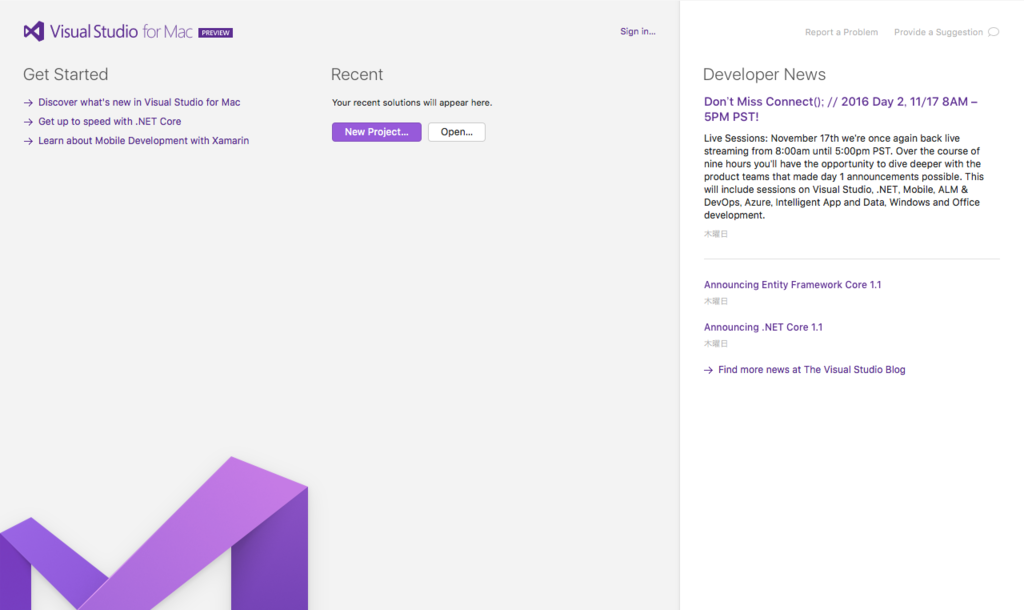
インストールが終わったので、とりあえず新規でプロジェクト作成。
プロジェクトを作成したらまずは何も変更せずに実行!
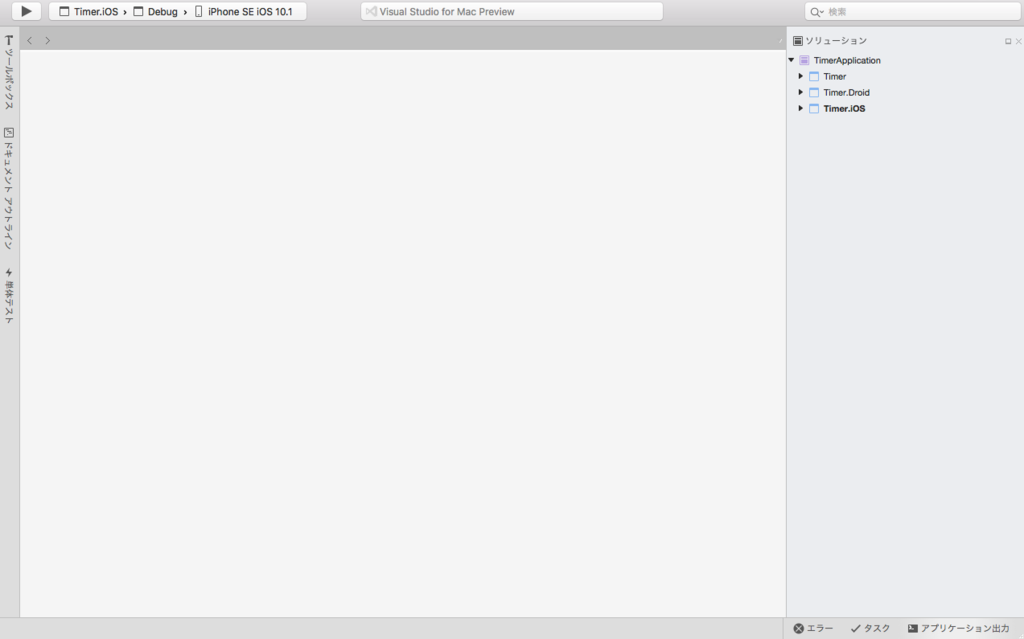
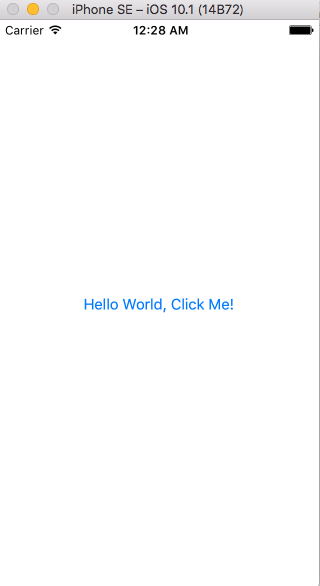
(おぉーちゃんと動いたー!笑)
デフォルトだとタップでカウントアップするようになっているようです。
ざっと触ってみたところ、Xamarin Studioの名前がVisual Studio for Macになったような感じです。
とりあえず近いうちにこれでアプリを作って記事を書いてみようと思います。
【Swift】よく使うextension集
extensionとは
既存のクラスに対し、メソッド、プロパティを追加することができる機能です。
Obj-Cで言うところのカテゴリと同じような機能で, 既存クラスで同じような処理を何箇所も行う場合は、extensionでまとめてしまうことで可読性や保守性が向上するかと思います。
UIApplication
extension UIApplication {

    /// 表示中のViewControllerを取得する
    ///
    /// - returns: UIViewController
    func currentViewController() -> UIViewController {
        var current: UIViewController
        var root = (self.windows.first?.rootViewController)! as UIViewController

        // モーダルビューが存在した場合はトップのものを取得
        while root.presentedViewController != nil {
            root = root.presentedViewController!
        }

        // rootがナビゲーションコントローラならば最後のViewControllerを取得
        if root.isKind(of: UINavigationController.classForCoder()) {
            current = (root as! UINavigationController).viewControllers.last!
        }
            // rootがタブバーコントローラならば選択中のViewControllerを取得
        else if root.isKind(of: UITabBarController.classForCoder()) {
            let selected = (root as! UITabBarController).selectedViewController

            // 選択中がナビゲーションコントローラならば最後のViewControllerを取得
            if (selected?.isKind(of: UINavigationController.classForCoder()))! {
                current = (selected as! UINavigationController).viewControllers.last!
            }
            else {
                current = selected!
            }
        }
        else {
            current = root
        }
        return current
    }
}

// 使い方
let current = UIApplication.shared.currentViewController()
UIView
extension UIView {
    /// subViewを全削除
    func removeAllSubViews() {
        self.subviews.forEach{
            $0.removeFromSuperview()
        }
    }

    /// キャプチャを取得
    ///
    /// - Returns: イメージ
    func capture() -> UIImage {

        // キャプチャする範囲を取得.
        let rect = self.bounds

        // ビットマップ画像のcontextを作成.
        UIGraphicsBeginImageContextWithOptions(rect.size, false, 0.0)
        let context: CGContext = UIGraphicsGetCurrentContext()!

        // 対象のview内の描画をcontextに複写する.
        self.layer.render(in: context)

        // 現在のcontextのビットマップをUIImageとして取得.
        let capturedImage : UIImage = UIGraphicsGetImageFromCurrentImageContext()!

        // contextを閉じる.
        UIGraphicsEndImageContext()

        return capturedImage
    }
}

// 使い方
self.view.removeAllSubViews()
let captureImage = self.view.capture()
UIImage
extension UIImage {

    /// 色とサイズを指定してイメージを生成します
    ///
    /// - parameter color: 色
    /// - parameter size:  サイズ
    ///
    /// - returns: イメージ
    class func generate(color: UIColor, _ size: CGSize = CGSize(width: 100, height: 100)) -> UIImage {
        let rect: CGRect = CGRect(origin: CGPoint.zero, size: size)

        UIGraphicsBeginImageContext(rect.size)
        let context: CGContext = UIGraphicsGetCurrentContext()!

        context.setFillColor(color.cgColor)
        context.fill(rect)

        let image: UIImage = UIGraphicsGetImageFromCurrentImageContext()!
        UIGraphicsEndImageContext()
        return image
    }
}

// 使い方
UIImage.generate(color: .red, CGSize(width: 150, height: 150))
String
extension String {
    /// MD5ハッシュ値を取得
    var md5: String! {
        let str = self.cString(using: String.Encoding(rawValue: String.Encoding.utf8.rawValue))
        let strLen = CC_LONG(self.lengthOfBytes(using: String.Encoding(rawValue: String.Encoding.utf8.rawValue)))
        let digestLen = Int(CC_MD5_DIGEST_LENGTH)
        let result = UnsafeMutablePointer<CUnsignedChar>.allocate(capacity: digestLen)

        CC_MD5(str!, strLen, result)

        let hash = NSMutableString()
        for i in 0..<digestLen {
            hash.appendFormat("%02x", result[i])
        }

        result.deallocate(capacity: digestLen)

        return String(format: hash as String)
    }
}

// 使い方
let md5Hash = "ABCDEFG".md5
UIFont
extension UIFont {
    class var hiragino: UIFont{
        return UIFont(name: "HiraKakuProN-W3", size: UIFont.preferredFont(forTextStyle: .body).pointSize)!
    }

    class var hiraginoBold: UIFont{
        return UIFont(name: "HiraKakuProN-W6", size: UIFont.preferredFont(forTextStyle: .body).pointSize)!
    }

    class var hiraginoMincho: UIFont{
        return UIFont(name: "Hiragino Mincho ProN W3", size: UIFont.preferredFont(forTextStyle: .body).pointSize)!
    }

    class var hiraginoMinchoBold: UIFont{
        return UIFont(name: "Hiragino Mincho ProN W6", size: UIFont.preferredFont(forTextStyle: .body).pointSize)!
    }
}

// 使い方
let hiraginoFont = UIFont.hiragino
let hiraginoBoldFont = UIFont.hiraginoBold
let hiraginoMinchoFont = UIFont.hiraginoMincho
let hiraginoMinchoBoldFont = UIFont. hiraginoMinchoBold
上記の他にも使っているものはたくさんあるのですが、自分で書いたものではなく、出典のわからないものなど多いので、以上になります。
自分用のextensionをまとめてライブラリ化し、新規プロジェクト作成時に追加するようにしておけば開発効率がどんどん上がっていくので、暇な時にオープンソースのものを探すのもよいかと思います。
【C#】Labelコントロールでテキストフォントのサイズを自動調節する
現在携わっているブロジェクトで実装した内容をメモ代わりに残そうと思います。
Excelでいうところの「縮小して全体を表示する」をWindowsFormのLabelコントロールで実装する要件が出てきた為、コントロールの矩形サイズから自動でフォントサイズを調節するユーザコントロールを作成しました。
WindowsFormのC#業務アプリはまだしばらく無くならないと思いますので、今後のプロジェクトの参考資料かな…。
namespace WindowsFormsApplication1
{
  partial class AutoFontSizeLabel
  {
    /// <summary>
    /// 必要なデザイナー変数です。
    /// </summary>
    private System.ComponentModel.IContainer components = null;

    /// <summary>
    /// 使用中のリソースをすべてクリーンアップします。
    /// </summary>
    /// <param name="disposing">マネージ リソースが破棄される場合 true、破棄されない場合は false です。</param>
    protected override void Dispose(bool disposing)
    {
        if (disposing && (components != null))
        {
            components.Dispose();
        }
        base.Dispose(disposing);
    }

    #region コンポーネント デザイナーで生成されたコード

    /// <summary>
    /// デザイナー サポートに必要なメソッドです。このメソッドの内容を
    /// コード エディターで変更しないでください。
    /// </summary>
    private void InitializeComponent()
    {
      this.SuspendLayout();
      this.ResumeLayout(false);
    }

    #endregion
  }
}
CalcFontSizeメソッドはMeasureStringメソッドを呼び出す際、引数の文字列が空文字の場合、SizeFが正しく計算されないため、空文字が引数で渡ってきた場合、初期値にそれぞれ0.1を設定しています。
using System;
using System.ComponentModel;
using System.Drawing;
using System.Windows.Forms;

namespace WindowsFormsApplication1
{
  public partial class AutoFontSizeLabel : Label
  {
    #region クラス変数
    /// <summary>
    /// フォントサイズを自動で算出するかのフラグ
    /// </summary>
    private bool mAutoFontSize = false;
    #endregion

    #region プロパティ
    /// <summary>
    /// フォントサイズを自動計算するかの値を取得または設定します。
    /// </summary>
    [Browsable(true)]
    [Category("表示")]
    [Description("フォントサイズを自動で計算するかの値を取得または設定します。")]
    public bool AutoFontSize
    {
      set
      {
        this.mAutoFontSize = value;
        Invalidate();
      }
      get
      {
        return this.mAutoFontSize;
      }
    }
    #endregion

    #region コンストラクタ
    /// <summary>
    /// クラスの新しいインスタンスを初期化します。
    /// </summary>
    public AutoFontSizeLabel()
    {
      InitializeComponent();
    }
    #endregion

    #region overrideメソッド
    /// <summary>
    /// 描画処理
    /// </summary>
    /// <param name="pevent"></param>
    protected override void OnPaint(PaintEventArgs pevent)
    {
      // 描画先のGraphicsオブジェクトを取得する
      var g = pevent.Graphics;

      // 描画に関連する値をコントロールのプロパティ等から取得する
      int height = this.Height;
      int width = this.Width;

      // 描画領域を指定する
      var rect = new Rectangle(0, 0, width, height);

      // 背景描画用のブラシを生成する
      using (backColorBrush = new SolidBrush(this.BackColor))
      {
        // 背景を描画する
        g.FillRectangle(backColorBrush, rect);
      }

      var size = new Size(width, height);
      var fontSize = CalcFontSize(this.Text, size, g);

      var font = this.Font;

      if (this.mAutoFontSize)
      {
        // 自動算出する場合、計算しておいたフォントサイズでフォントのインスタンスを再生成する
        font = new Font(this.Font.Name, fontSize);
      }

      // StringAlignmentからContentAlignmentへ変換する
      var stringFormat = new StringFormat();
      var num = (Int32)System.Math.Log((Double)this.TextAlign, 2);
      stringFormat.LineAlignment = (StringAlignment)(num / 4);
      stringFormat.Alignment = (StringAlignment)(num % 4);

      // 文字描画用のブラシを生成する
      using (var foreColorBrush = new SolidBrush(this.ForeColor))
      {
        // 文字を描画する
        g.DrawString(this.Text, font, foreColorBrush, rect, stringFormat);
      }
    }
    #endregion

    #region privateメソッド
    /// <summary>
    /// 引数で指定されたグラフィックオブジェクトに描画する最適なフォントサイズを算出します。
    /// </summary>
    /// <param name="str">出力する文字列</param>
    /// <param name="size">サイズ</param>
    /// <param name="g">グラフィックオブジェクト</param>
    /// <returns>フォントサイズ</returns>
    private float CalcFontSize(string str, Size size, Graphics g)
    {
      var s = new SizeF(0.1F, 0.1F);
      var a = 0.1F;
      var b = 0.1F;

      if (!string.IsNullOrEmpty(str))
      {
        s = g.MeasureString(str, new Font(this.Font.Name, this.Font.Size));
        a = (size.Width / s.Width);
        b = (size.Height / s.Height);
      }
      return (a < b) ? a : b;
    }
    #endregion
  }
}
DrawStringメソッドで文字を描画すると微妙に右にずれます。掲示板などで色々議論されていますが、今回未対応です。以下のサイトが参考になるかと思います。
VB.netで文字を正確な位置に描く。
【Xamarin】落ちないアプリの作成【Android】
Xamarinが無料になってから、色々なところでかなり盛り上がっているように感じます。
そんな私も最近Xamarin勉強中です笑
今回は、Xamarinについて調べているうちに、面白い内容を見つけたので、試すついでに記事にしてみました。
はじめに
タイトルになっている落ちないアプリ。
そんなものはありません!!
だけど、開発者としては落ちないアプリを作っていきたいですよね?
どうやって作るのか
上で書いたように絶対に落ちないアプリを作るというのは現状不可能です。
- 多種多様な端末、バージョン
- メモリ不足
- バグ
etc...
そこで、例外をキャッチして、とりあえず落ちないようにしてしまおうという考えです。
例外ハンドラ
androidで例外ハンドラといえばUnhandledExceptionですよね。
AppDomain.CurrentDomain.UnhandledException += (s, e) => {};
UnhandledExceptionを使用すれば例外をキャッチできますが、補足することができないためアプリが終了してしまいます。
ならどうするのか、、、
以下の処理を使えばアプリを終了させないようにできるそうです!
AndroidEnvironment.UnhandledExceptionRaiser += (s, e) => {
    e.Handled = true;
};
(Handledをtrueにすることで強制的に補足済みの例外にしています)
実際のコードは以下になります。
protected override void OnCreate(Bundle savedInstanceState) {
    base.OnCreate(savedInstanceState);
    SetContentView(Resource.Layout.Main);
    AndroidEnvironment.UnhandledExceptionRaiser += (s, e) => {
        e.Handled = true;
    };
}
サンプル
実際に以下のように組み込んでみました。
(今回はボタンクリックでExceptionを発生させ、UnhandledExceptionRaiser内でトーストを表示させています)
protected override void OnCreate(Bundle savedInstanceState) {
    base.OnCreate(savedInstanceState);
    SetContentView(Resource.Layout.Main);

    Button button = FindViewById<Button>(Resource.Id.myButton);
    button.Click += delegate {
        throw new Exception("EXCEPTION");
    };

    AndroidEnvironment.UnhandledExceptionRaiser += (s, e) => {
        Toast.MakeText(this, "例外発生!!", ToastLength.Short).Show();
        e.Handled = true;
    };
}
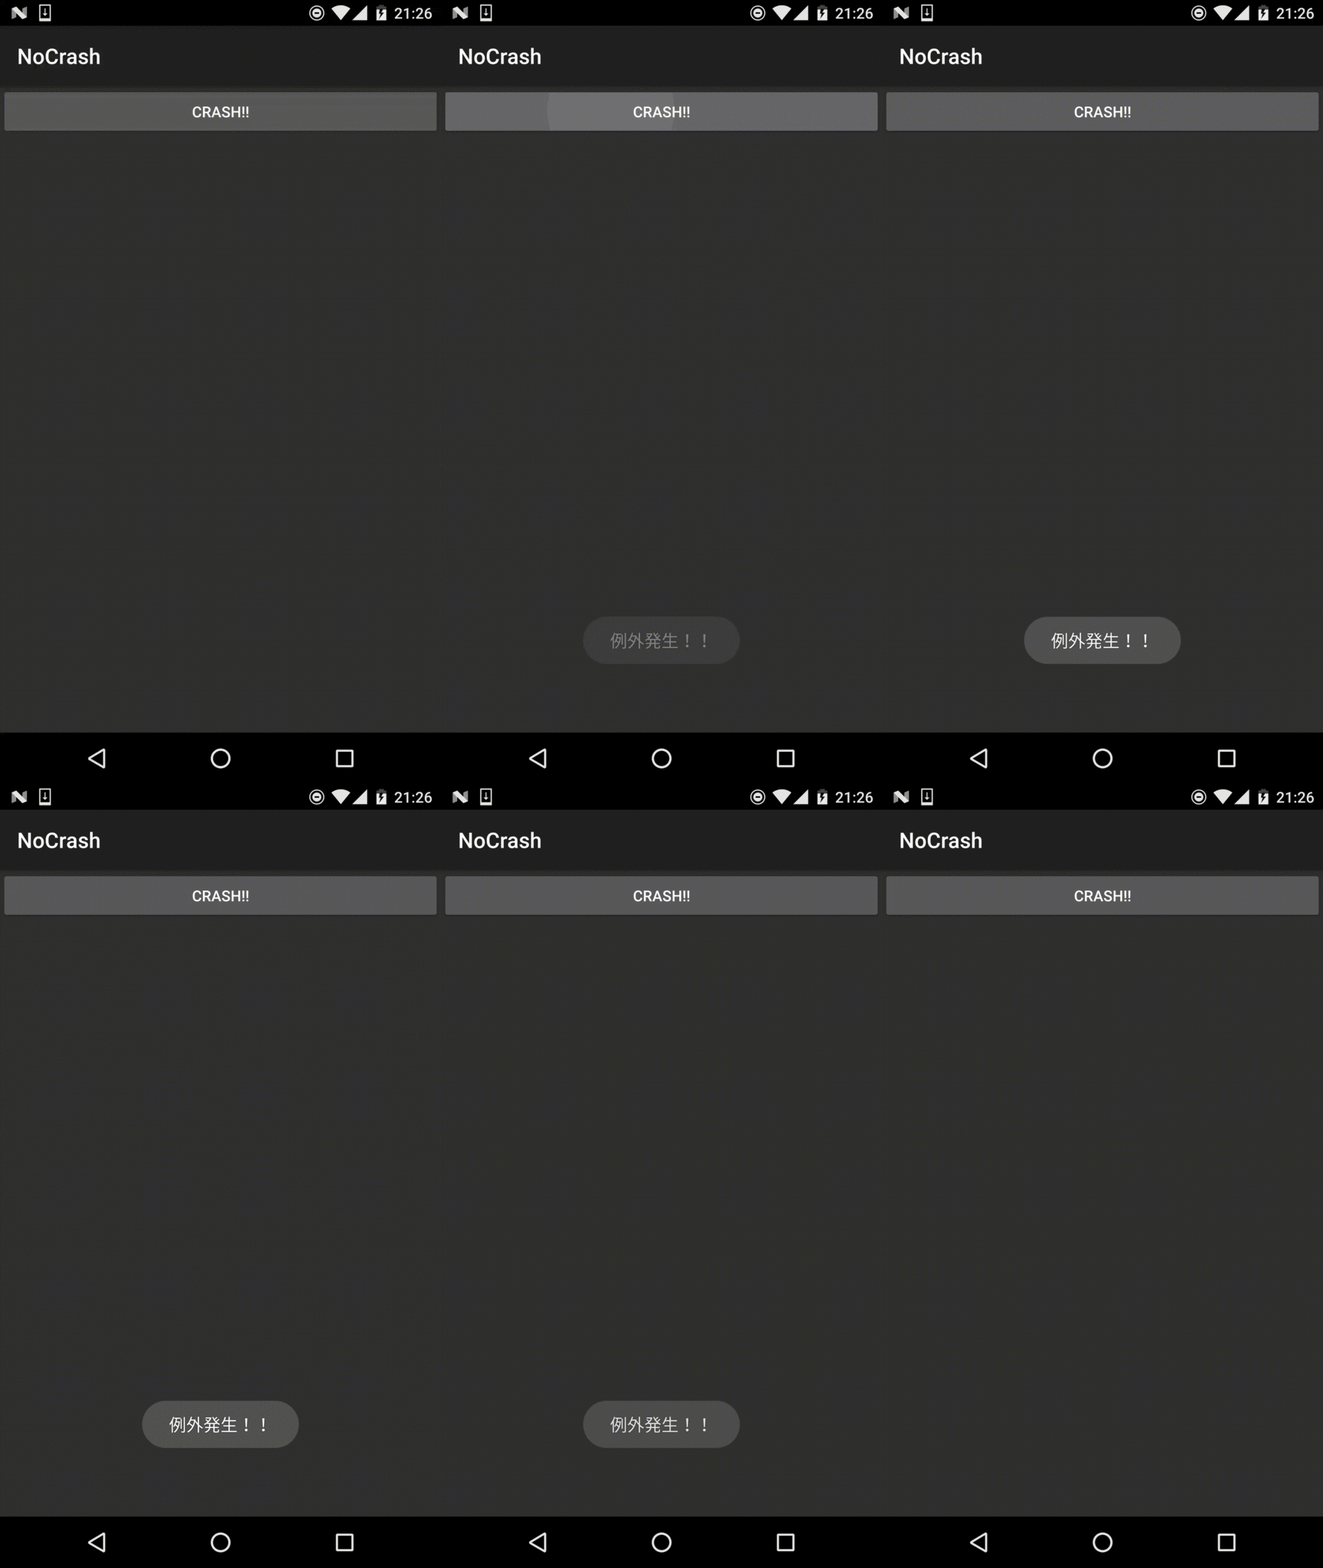
とりあえず落ちないアプリ?の作成はできました笑
これは使い方次第でありかも?
【iOS 10】User Notifications Frameworkで通知をカスタムしてみる
iOS 10が公開されて1ヶ月が経ちました。
新しいAPIが大量に追加され、Swiftもメジャーアップデートし、色んな意味で楽しい開発ができています。
そして、発売日からちょうど1ヶ月後の、10月16日に予約開始日に予約していたiPhone 7 Plus ジェットブラックが届きました。(被写界深度エフェクトタノチーwwwww)
街なかの広告を見てイライラする日々からついに開放されました。
さて、今回はiOS 10で追加されたUser Notifications Frameworkを紹介します。
User Notifications Framework
これまでiOSでの通知は"Remote Notification"と"Local Notification"が別物として存在していましたが、User Notifications Frameworkではこの2つを統合し、同じフレームワーク内で処理することができます。
そして、アプリ起動中でも通知を表示できるようになったので、別途アプリ内通知を実装する必要がなくなりました。
発生条件
User Notifications Frameworkでは以下の4つのトリガーによって通知を発生します。
・Push
iOS 9までに存在していたRemote Notificationと同等
・Time Interval
一定時間後に通知を発生する
繰り返し可能だが、最短時間が60秒に制限される
・Calendar
日時指定で通知を発生する
DateComponentsに一致すれば繰り返し可能
・Location
位置情報に基づき通知を発生する
カスタム
地図やカレンダーの情報を通知上に表示したり、画像や動画、音声などのメディアを添付することができるようになりました。
Notification Content Extensionを実装することで自由にレイアウトを変更することができます。 通知直後は縮小表示になるので3DTouchに対応している場合は押し込むことで、対応していない場合は下に引き下げることで全体を表示します。
また、キーボードからの入力も行えるのでメッセンジャーアプリなどでアプリを起動することなく返信することができるようになります。
サンプル
今回は、Pushを除いたトリガーでの通知発生と画像の添付、アクションの追加までのサンプルを作成してみました。
まずは、通知を許可するようにユーザに求めるダイアログを表示します。
AppDelegateを以下のように編集します
import UserNotifications

class AppDelegate: UIResponder, UIApplicationDelegate, UNUserNotificationCenterDelegate {
    var window: UIWindow?

    func application(_ application: UIApplication, didFinishLaunchingWithOptions launchOptions: [UIApplicationLaunchOptionsKey: Any]?) -> Bool {
        // 通知の許可をリクエスト
        let center = UNUserNotificationCenter.current()
        center.requestAuthorization(options: [.badge, .sound, .alert], completionHandler: { (granted, error) in
            if error != nil {
                return
            }

            if granted {
                debugPrint("通知許可")
                let center = UNUserNotificationCenter.current()
                center.delegate = self
            } else {
                debugPrint("通知拒否")
            }
        })

        return true
    }
}
次に通知を行いたい場所で以下の処理を行います。
トリガーの設定
5秒後に通知する場合
let trigger: UNNotificationTrigger
trigger = UNTimeIntervalNotificationTrigger(timeInterval: 5, repeats: false)
60秒毎通知する場合
let trigger: UNNotificationTrigger
trigger = UNTimeIntervalNotificationTrigger(timeInterval: 60, repeats: true)
日時指定で通知する場合 (現在時間から1分後に設定)
let trigger: UNNotificationTrigger
var dateComponents = DateComponents()
dateComponents.minute = dateComponents.minute! + 1
trigger = UNCalendarNotificationTrigger(dateMatching: dateComponents, repeats: false)
位置情報によって通知する場合
let trigger: UNNotificationTrigger
let coordinate = CLLocationCoordinate2DMake(35.170915, 136.8793482)
let region = CLCircularRegion(center: coordinate, radius: 100.0, identifier: "description")
trigger = UNLocationNotificationTrigger(region: region, repeats: false)
表示の設定
通常
let content = UNMutableNotificationContent()
content.title = "タイトル"
content.body = "ボディ"
content.sound = UNNotificationSound.default()


// 通常
let request = UNNotificationRequest(identifier: "normal",
                                    content: content,
                                    trigger: trigger)


UNUserNotificationCenter.current().add(request, withCompletionHandler: nil)
画像を表示
let content = UNMutableNotificationContent()
content.title = "タイトル"
content.body = "ボディ"
content.sound = UNNotificationSound.default()

if let url = Bundle.main.url(forResource: "image", withExtension: "png") {
    let attachment = try? UNNotificationAttachment(identifier: "attachment", url: url, options: nil)
    if let attachment = attachment {
        content.attachments = [attachment]
    }
    // categoryIdentifierを設定
    content.categoryIdentifier = "attachment"
}
let request = UNNotificationRequest(identifier: "attachment",
                                    content: content,
                                    trigger: trigger)

UNUserNotificationCenter.current().add(request, withCompletionHandler: nil)
アクション
UNNotificationCategoryに設定している"repry"と"cancel"はハンドリングの際に処理を分けるために使用します。
let content = UNMutableNotificationContent()
content.title = "タイトル"
content.body = "ボディ"
content.sound = UNNotificationSound.default()

let repry = UNNotificationAction(identifier: NotificationActionID.repry.rawValue,
                                 title: "返信", options: [])

let cancel = UNNotificationAction(identifier: NotificationActionID.cancel.rawValue,
                                  title: "キャンセル",
                                  options: [])

let category = UNNotificationCategory(identifier: "message",
                                      actions: [repry, cancel],
                                      intentIdentifiers: [],
                                      options: [])
UNUserNotificationCenter.current().setNotificationCategories([category])

// categoryIdentifierを設定
content.categoryIdentifier = "message"

let request = UNNotificationRequest(identifier: "message",
                                    content: content,
                                    trigger: trigger)

//  通知をセット
UNUserNotificationCenter.current().add(request, withCompletionHandler: nil)
通知のハンドリング
通知を受け取る際はAppdelegateへUNUserNotificationCenterDelegateを実装します
    /// 通知表示前のデリゲート
    ///
    /// - parameter center:            NotificationCenter
    /// - parameter notification:      Notification
    /// - parameter completionHandler: Handler
    private func userNotificationCenter(_ center: UNUserNotificationCenter,
                                        willPresent notification: UNNotification,
                                        withCompletionHandler completionHandler: (UNNotificationPresentationOptions) -> Void) {
        let identifier = notification.request.identifier
        switch identifier {
        case "alert":
            completionHandler([.alert]) // 通知のみ行う
        case "both":
            completionHandler([.sound, .alert]) // サウンドと通知
        default:
              ()
        }
    }
通知設定時のアクションに対応する動作を行う場合は以下のようにします。
アクションに対してNotificationActionIDを設定し、デリゲート内で分岐します。
public enum NotificationActionID: String {
    case repry
    case cancel
}

    /// 通知開封時のデリゲート
    ///
    /// - parameter center:            NotificationCenter
    /// - parameter response:          Notification
    /// - parameter completionHandler: Handler
    private func userNotificationCenter(_ center: UNUserNotificationCenter,
                                didReceive response: UNNotificationResponse,
                                withCompletionHandler completionHandler: () -> Void) {

        switch response.actionIdentifier {
        case NotificationActionID.repry.rawValue:
            /* 返信処理 */
        case NotificationActionID.cancel.rawValue:
            /* キャンセル処理 */
        default:
            ()
        }

        debugPrint("opened")
        completionHandler()
    }
PHPの関数集(日付関連)
今回はPHPで日付を出力する際によく使うと思われる関数のサンプルを紹介していきたいと思います。
現在日時を取得する
現在日時はdate関数を使用します。date関数にフォーマットを指定することで指定したフォーマットの日時を取得することができます。
PHPのdate関数で日時を取得してもミリ秒までは取得できません。ミリ秒まで出力したい場合はstrtotime関数を使用します。
  function getNowDateTime() {
    return date("Y-m-d H:i:s");
  }

  function getNowDateTimeMicro() {
    return date("Y-m-d H:i:s") . "." . substr(explode(".", (microtime(true) . ""))[1], 0, 3);
  }
指定した月の月初、月末日を取得する。
PHPの場合、strtotime関数の書式指定で簡単に取得することができます。
modify関数へ引数の日付が変数展開されるよう記述しておきます。
  function getFirstDate($targetDate) {
    $d = new DateTime($targetDate);
    $d->modify("first day of $targetDate");
    return $d->format('Y-m-d H:i:s');
  }

  function getLastDate($targetDate) {
    $d = new DateTime($targetDate);
    $d->modify("last day of $targetDate");
    return $d->format('Y-m-d H:i:s');
  }
次月の月初、月末を取得する。
次月を求めるためにmodify関数へ引数の日付を変数展開されるよう記述しておきます。
  function getFirstDateNextMonth($targetDate) {
    $d = new DateTime($targetDate);
    $d->modify("first day of $targetDate next month");
    return $d->format('Y-m-d H:i:s');
  }

  function getLastDateNextMonth($targetDate) {
    $d = new DateTime($targetDate);
    $d->modify("last day of $targetDate next month");
    return $d->format('Y-m-d H:i:s');
  }
参考
http://php.net/manual/ja/function.date.phpphp.netPHPリファレンス date関数
http://php.net/manual/ja/function.microtime.phpphp.netPHPリファレンス microtime関数
http://php.net/manual/ja/function.strtotime.phpphp.netPHPリファレンス strtotime関数
マルチウィンドウ
さてさて、先日「AndroidN」が正式リリースされました。
AndroidMからの大きな変更点としては
- マルチウィンドウ
- データセーバー
- 通知
などでしょうか。
新機能・変更点などは色々なサイトがまとめてくれているので割愛します。
http://mobilelaby.com/blog-entry-android-n-new-feature.html
http://androidlover.net/android-os/android-m/android-m-surely-releases-2015.html
様々な変更がありますが、その中で今回はマルチウィンドウの対応方法について書いていきたいと思います。
マルチウィンドウとは
マルチウィンドウとは1画面上に複数のアプリを同時に表示すること
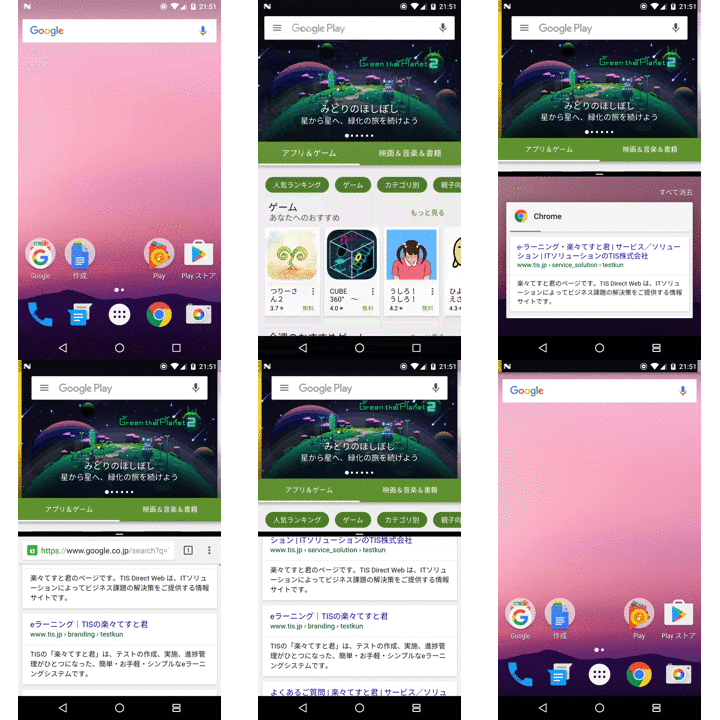
では、AndroidNならどんなアプリでもマルチウィンドウにできるのか?
答えは×です。
簡単な手順ですが、対応しなければいけないことがあります。
アプリをマルチウィンドウに適用する
アプリでマルチウィンドウモードを可能にするためには、
<application>全体、または適用させたい個々の<activity>のマニフェストファイルで、
新たな属性android:resizeableActivityをtrueに設定する必要があります。
(アプリのtargetSdkVersionがandroidNより以前の場合、属性はデフォルトでfalseになっています)
簡単ですね!!
マルチウィンドウに対応できたら、以下の属性でリサイズの設定をすることができます。
android:defaultWidth:デフォルトの幅を指定
android:defaultHeight:デフォルトの高さを指定
android:gravity:グラビティの初期値。アプリをどこで分割すればよいかを指定
android:minimumSize:最小サイズを指定
マニフェストを修正して、サイズを決めるだけで対応できる。
素晴らしいですね!
と思っていることでしょう。
実はこのマルチウィンドウ、一つ罠が仕掛けられています。
マルチウィンドウに対応しないのであれば、resizeableActivityをfalseにすれば、確かにマルチウィンドウにはならないです。
が、
startActivityForResultで別アプリから呼び出された場合は話は別です。
Activityのマルチウィンドウ設定をfalseにしていても、共有の場合は強制でマルチウィンドウモードになってしまいます。
【参考サイト】
Pro-tip 5: Activities started by other apps must always support multi-window
ということで、暗黙的インテントを作成する場合はマルチウィンドウに対応しておきましょう!
【iOS 10】SiriKit触ってみた
さて、iOS 10から追加されたSiriKitを使うことで、Siriからアプリの機能を使うことができるようになります。 今回はSiriからの機能を使い、メッセージを送るためのサンプルを紹介します。
公式のサンプルや執筆時点でネット上に存在する情報を元に書いているので、動作に問題があるかもしれませんが、とりあえずSiriからの呼び出しが成功したので、手順を紹介します。
環境
・Xcode Version 8.0 beta 6
・iOS 10 beta 8
プロジェクト設定
まず、アプリに対して、Siriの使用を有効にします。 プロジェクトファイルを開き、[Target]からアプリ本体を選択します。 Capabilityタブを開き、SiriをONにして下さい。
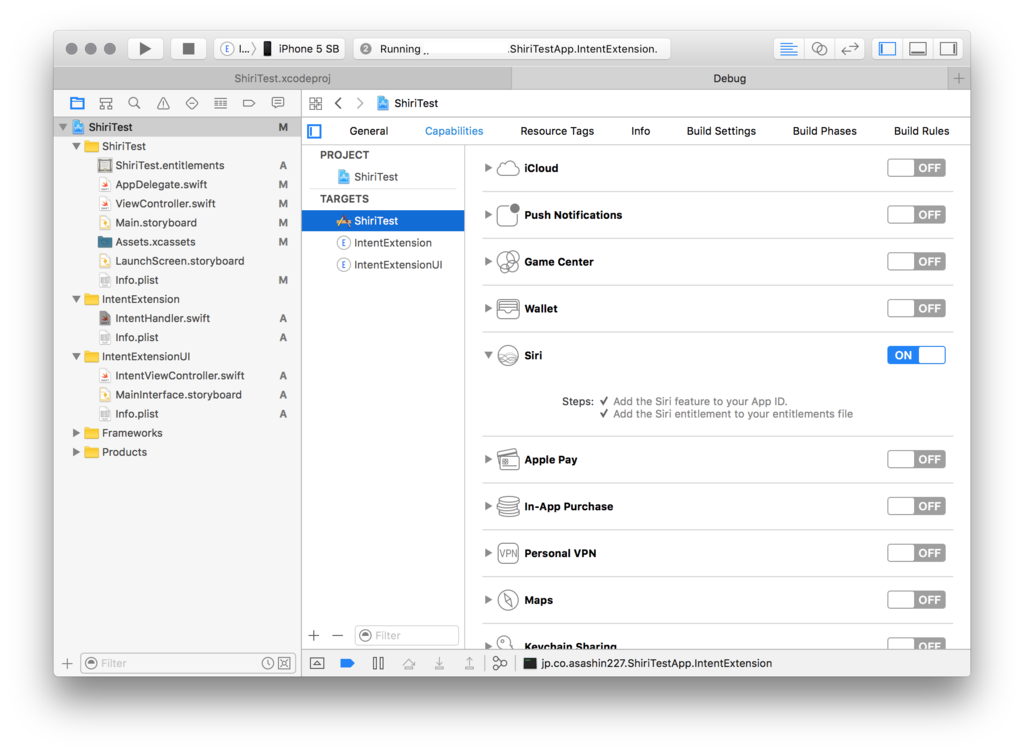
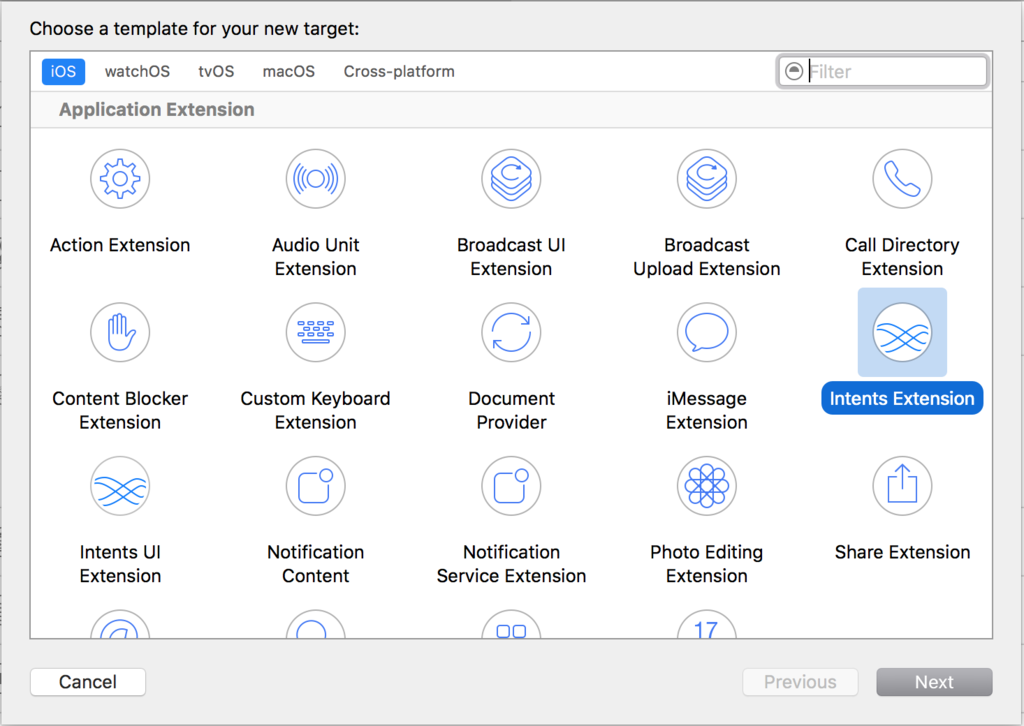
次に、Siriから呼ばれるハンドラを作成します。 [File]→[New]→[Target]を選択

iOSタブから[Intents Extension]を選択します。 任意の名前をつけ、プロジェクトにターゲットを追加します。
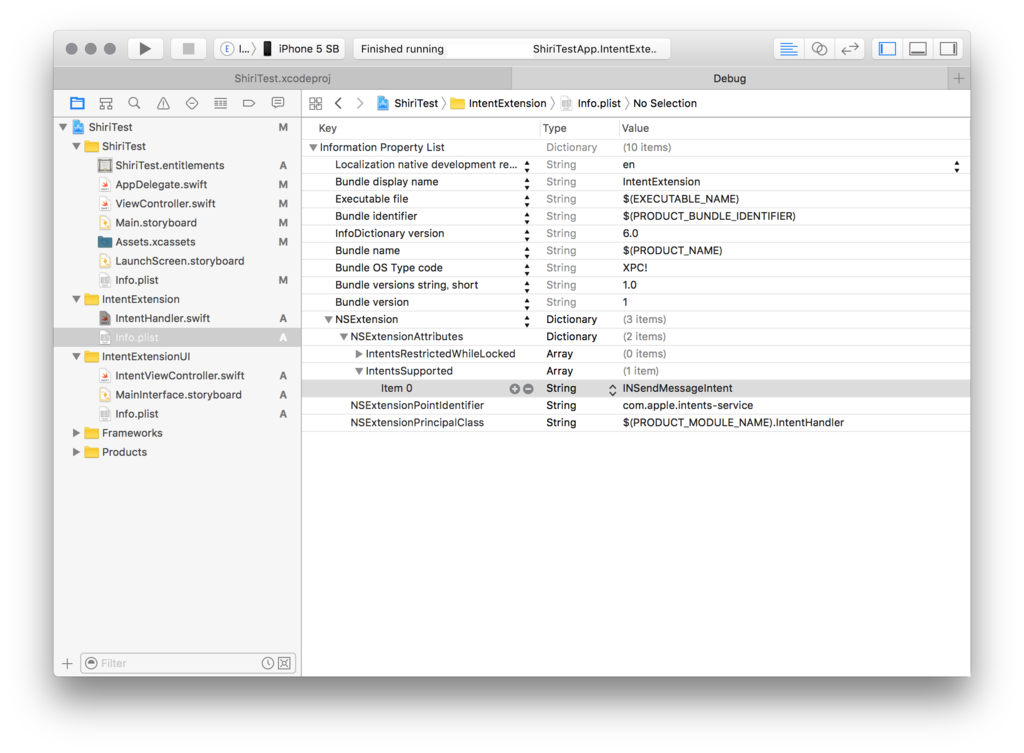
次に、追加したターゲットのinfo.pristファイルを開き、[NSExtension]→[NSExtensionAttributes]→[IntentsSupported]の中身をINSendMessageIntentのみにします。
コード
Intents ExtensionのIntentHandler.swiftを編集します。
import Intents

class IntentHandler: INExtension, INSendMessageIntentHandling, INSearchForMessagesIntentHandling, INSetMessageAttributeIntentHandling {

    override func handler(for intent: INIntent) -> Any {
        return self
    }

    // MARK:- 解決フェーズ
    // 宛先の選択時にコールされる
    func resolveRecipients(forSendMessage intent: INSendMessageIntent, with completion: @escaping ([INPersonResolutionResult]) -> Void) {
        NSLog("resolveRecipients : %@", intent.recipients?.description ?? "nil")
        guard let recipients = intent.recipients , recipients.count > 0 else {
            completion([INPersonResolutionResult.needsValue()])
            return
        }

        let results:[INPersonResolutionResult] = recipients.flatMap{ INPersonResolutionResult.success(with: $0)}
        completion(results)
    }


    // 送信テキストの入力時にコールされる
    func resolveContent(forSendMessage intent: INSendMessageIntent, with completion: @escaping (INStringResolutionResult) -> Void) {
        NSLog("resolveContent : %@", intent.content ?? "nil")
        // メッセージ内容は必須なので、指定されていない場合は、needsValue()を設定
        let result = intent.content != nil ? INStringResolutionResult.success(with: intent.content!) :
            INStringResolutionResult.needsValue()
        completion(result)
    }

    // MARK:- 確認フェーズ
    // 送信の確認時にコールされる
    func confirm(sendMessage intent: INSendMessageIntent, completion: @escaping (INSendMessageIntentResponse) -> Void) {
        NSLog("confirm : %@", intent.description)
        let response = INSendMessageIntentResponse(code: .success, userActivity: nil)
        completion(response)
    }


    // 送信の実行時にコールされる
    func handle(sendMessage intent: INSendMessageIntent, completion: @escaping (INSendMessageIntentResponse) -> Void) {
        // Implement your application logic to send a message here.
        NSLog("sendMessage : %@", intent.content ?? "nil");
        let userActivity = NSUserActivity(activityType: NSStringFromClass(INSendMessageIntent.self))
        let response = INSendMessageIntentResponse(code: .success, userActivity: userActivity)
        completion(response)
    }


    // MARK:- Handling Intentフェーズ
    func handle(setMessageAttribute intent: INSetMessageAttributeIntent, completion: @escaping (INSetMessageAttributeIntentResponse) -> Void) {
        NSLog("handle %@", intent.description)
        // メッセージ送信処理を追加
        let response = INSetMessageAttributeIntentResponse(code: .success, userActivity: nil)
        completion(response)
    }


    func resolveGroupName(forSendMessage intent: INSendMessageIntent, with completion: @escaping (INStringResolutionResult) -> Swift.Void){
        NSLog("resolveGroupName %@", intent.groupName ?? "nil")
        // グループに対して送信する場合
        let notRequired = INStringResolutionResult.notRequired()
        completion(notRequired)
    }

    func resolveSenders(forSearchForMessages intent: INSearchForMessagesIntent, with completion: @escaping ([INPersonResolutionResult]) -> Swift.Void){
        NSLog("resolveSender %@", intent.senders?[0].displayName ?? "nil")
        let person = INPerson(personHandle: INPersonHandle(value: "Value",
                                                           type: .emailAddress),
                              nameComponents: PersonNameComponents(),
                              displayName: "displayName",
                              image: nil,
                              contactIdentifier: nil,
                              customIdentifier: nil)

        let sender = intent.senders == nil ?
            INPersonResolutionResult.success(with: person) : INPersonResolutionResult.success(with: intent.senders![0])
        completion([sender])
    }


    func resolveServiceName(forSendMessage intent: INSendMessageIntent, with completion: (INStringResolutionResult) -> Void) {
        NSLog("resolveServiceName %@", intent.description)
        let notRequired = INStringResolutionResult.notRequired()
        completion(notRequired)
    }


    // Implement handlers for each intent you wish to handle.  As an example for messages, you may wish to also handle searchForMessages and setMessageAttributes.

    // MARK: - INSearchForMessagesIntentHandling

    func handle(searchForMessages intent: INSearchForMessagesIntent, completion: @escaping (INSearchForMessagesIntentResponse) -> Void) {
        // Implement your application logic to find a message that matches the information in the intent.

        let userActivity = NSUserActivity(activityType: NSStringFromClass(INSearchForMessagesIntent.self))
        let response = INSearchForMessagesIntentResponse(code: .success, userActivity: userActivity)
        // Initialize with found message's attributes
        response.messages = [INMessage(
            identifier: "identifier",
            content: "I am so excited about SiriKit!",
            dateSent: Date(),
            sender: INPerson(personHandle: INPersonHandle(value: "sarah@example.com", type: .emailAddress), nameComponents: nil, displayName: "Sarah", image: nil,  contactIdentifier: nil, customIdentifier: nil),
            recipients: [INPerson(personHandle: INPersonHandle(value: "+1-415-555-5555", type: .phoneNumber), nameComponents: nil, displayName: "John", image: nil,  contactIdentifier: nil, customIdentifier: nil)]
            )]
        completion(response)
    }


}
実行
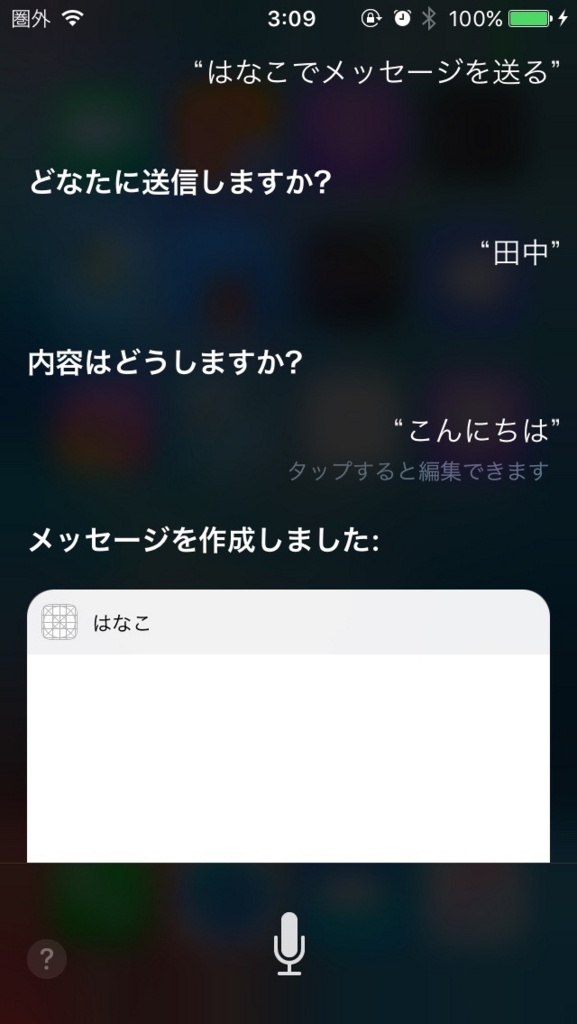
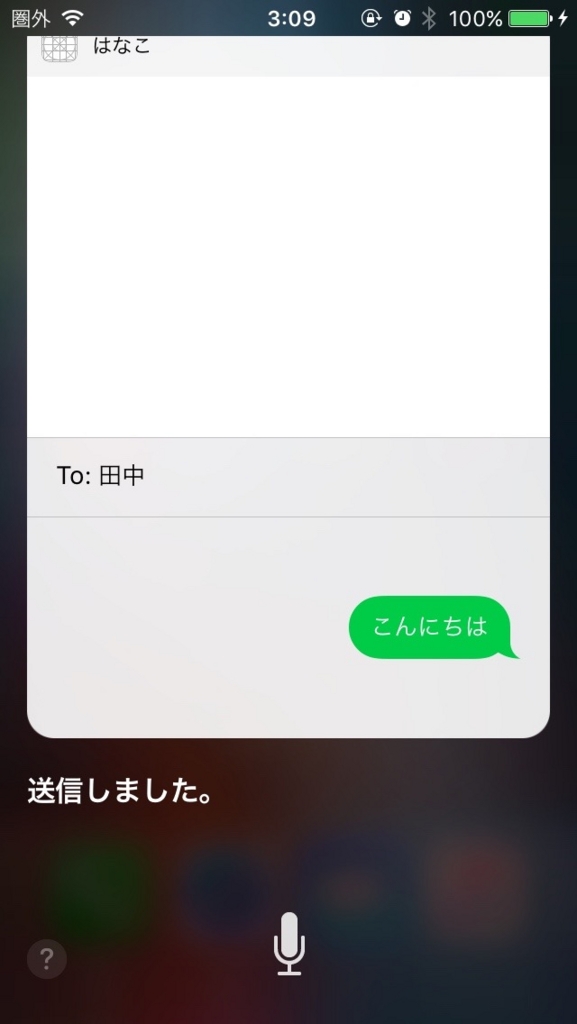
実際にSiriから呼び出してみましょう。
「アプリ名 + メッセージを送って」と言うと呼び出してくれます。
はじめは Siri Test というアプリ名を設定していたのですが、 Siri自身へのメッセージと勘違いをされ、「はい、なんでしょう?」のように応答されたので、混同しにくい適当な名前にしましょう。
今回は「はなこ」というアプリ名にしました。
